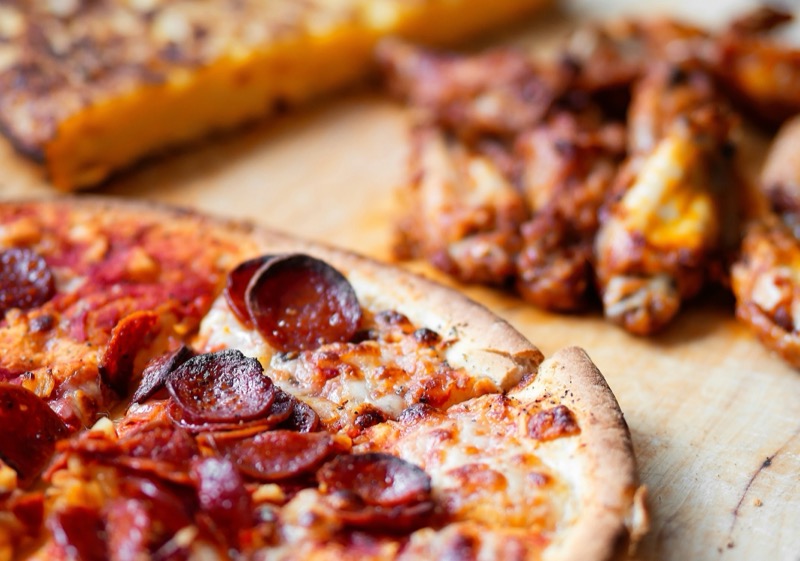
Charred Crust Pizza
Pizza with detailed technique, high gluten dough, and a hot launch that chars the crust for a crisp yet airy bite, using a pizza oven and stone.
Ingredients
Dough
- ice cold water
- Diamond Crystal Baking Salt or fine sea salt
Pizza Sauce
- Bianco DiNapoli crushed tomatoes
Pizza
- Bianco DiNapoli crushed tomatoes
- shredded Trader Joe's whole milk low-moisture mozzarella, frozen
- fresh grated pecorino romano
- Semolina flour + 50g all purpose flour for dusting
- ⅛ tsp dried oregano
Instructions
Dough
Add ice cold water to the food processor.
Mix the flour, salt, and yeast in a separate bowl. Add the dry ingredients to the food processor.
Process for 15 seconds, remove dough and attachment and make sure all dough is scraped off of the sides with bench scraper and reintegrated into the dough. Process for 15 more seconds, measure temperature with your IR thermometer. Repeat in 15 second intervals until the dough reads 72 - 74°F. Do not go higher than 76°F to avoid damaging gluten.
Transfer the dough to your bench. Knead shortly, a few times to bring the dough into the form of a ball, cover with saran wrap, and let it rest at room temperature for 30 minutes.
Divide the dough into 400g portions. Fold each portion in half, then fold in half again in the perpendicular direction to build tension. Place seam-side down and rotate while dragging it against the unfloured bench exactly 8 times — no more, no less — to build a smooth, taut skin. Pinch any bottom seam that remains. Circular dough balls make circular pizzas (video).
Grease your proofing container with canola oil — it won't impart an olive oil flavor over the long proof. Transfer the dough to the container with your bench scraper. After placing in a proofing container, lightly oil your hands with canola oil and gently rub the top of the dough to make it less sticky and retain moisture. Cover and place in the refrigerator for 3 - 4 days.
Pre-Assembly
Optionally hand blend the crushed tomatoes in a small bowl until smooth, keeping the blender immersed to avoid oxidation. Cover with saran wrap. It's ok to freeze / refrigerate for a bit, but always bring to room temperature immediately before use to avoid gummy pizza.
Grate the mozzarella cheese in the rotary blender, place in a large sandwich bag and freeze at least 1 hour prior to baking. Grate 1oz of pecorino romano with a fine rotary grater and place in another small bowl.
Mix 50/50 semolina + all purpose flour in a small bowl and set aside.
Pizza Assembly
Approximately 1 hour prior to baking, preheat your oven on high to bring the stone up to temperature evenly.
Approximately 2 hours prior to baking, remove dough from the refrigerator, carefully remove the dough from the proofing container with your bench scraper and place in a large greased plastic tupperware and allow the dough to come to 60-65°F at room temperature.
Dust your wooden peel with a bench flour to keep pizza from sticking.
Remove dough with your bench scraper and cover liberally with bench flour.
Stretch dough to 16" (video).
Place the dough on your wooden peel with the rough bottom side facing up.
Spread the tomato sauce over the pizza in a circular motion with a large spoon all the way to the raised portion that will become your crust.
Keep the flame on low from here on — you'll be launching in 3-5 minutes. You want the stone to read about 625°F at launch, with the ambient temperature near the flame running hotter, around 700°F, to brown the cheese without burning the bottom.
Shake ⅛ tsp of dried oregano evenly over the sauce.
Spread the 1 oz of fresh grated pecorino romano evenly over the sauce and oregano.
Spread the mozzarella evenly over the entire pizza, covering as much of the sauce and pecorino as possible. Again, avoid large concentrations in any one area to avoid soggy spots.
Squirt about 2 tsp of olive oil over the cheese in a circular motion just before launching.
Launch / Bake
Launch the pizza once the stone reads about 625°F, keeping the flame fairly low. Top heat at the flame source should run around 700°F — hot enough to brown the cheese before it separates.
Bake for about 5 minutes, rotating the pizza every 30 seconds or so for even color. Watch the cheese and don't let it separate too much.
After 5 minutes, slide a screen under the pizza to protect the crust and bake 1-2 minutes more to crisp it up further. You can turn off the top heat here and just rotate occasionally.
Remove the pizza from the oven with your large metal peel and place on a wire rack. Brush the crust with olive oil.
Transfer the pizza to a cutting board, slice, and return to the wire rack to keep crispy. Serve hot.
Equipment
Tips & Notes
Don't over-process the dough. Stop once you reach 74°F to avoid gluten breakdown.
Use an infrared thermometer for quick and accurate temperature checks.
Notes
Instant yeast, like SAF Red, is easier and just as effective as active dry yeast (ADY) without needing to bloom in warm water. It's best stored in your freezer, where it stays robust and active for long-term use.
To achieve optimal cheese melting and prevent oil separation in high-temperature ovens, use frozen freshly shredded whole milk low-moisture mozzarella instead of pre-shredded varieties.
A food processor with a dough attachment is preferred for best dough texture, though even inexpensive models will work.
Using a wooden peel, as recommended in the pizza assembly step, makes a successful pizza launch more likely because dough is less likely to stick compared to metal peels.
Metal peels should be used specifically for rotating the pizza during baking and retrieving it from the oven.
While the dough is easiest to work with after 3 days of rest, the best texture and flavor typically develop by day 4. However, dough resting this long is more prone to tearing during stretching.
When bringing dough to temperature before stretching, aim for 60-65°F. If the dough is colder than 60°F it will bake gummy and not crisp properly; if warmer than 65°F it may tear easily and bubble excessively.
When applying sauce, aim for an even distribution across the pizza. Avoid pooling sauce, especially in the center, to prevent sogginess or tearing during baking.
Olive oil and sugar have been withheld as dough ingredients due to high temperatures of the pizza oven to prevent burning. These are often employed in lower temperature ovens to improve browning.
Ratings & Reviews
Log in to rate this recipe and leave a review.
No reviews yet. Be the first!